Photoscape : Free Photo Editing Software
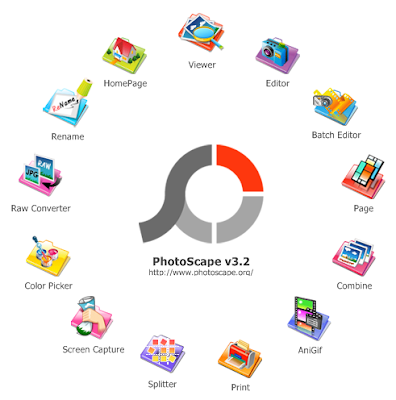
PhotoScape is an all-in-one style photo editor with fun and ease of use. Major capabilities are: viewer, editor, batch editor, page, combine, animated GIF, print, splitter, screen capture, color picker, rename, raw converter, resizing, brightness/color/white-balance adjustment, backlight correction, frames, balloons, text, drawing pictures, cropping, filters, red eye removal and blooming. PhotoScape has been used for two years and is expanding its features continuously.
 Photoscape is a really excellent photo editing tool that includes just about everything you need to view, optimize, edit, print and have fun with your photos, all for free.
Photoscape strikes us from the very beginning with an uncommon interface design from which you can choose what you want to do: view pictures, optimize those that didn't come out so well, print several photos on a single page collage-style or perhaps add any.
Listing down some of the cool features and tips for Photoscape :
Full / Partial capture
Photoscape comes with a great screen capture tool that can take snapshots of the entire screen, a window, or a selected region, and the captured image can even be modified before saving with the plethora of editing tools that comes inbuilt with the software. Click on the Screen Capture icon in the Photoscape circular menu. In the dialog box that appears now, uncheck Sound if you do not want to hear the sounds being played during the capture process.
If you want to capture just one particular window, click on Capture Window and then hover your mouse over the desired window or window object. You will see that it’s bordered by a rectangle. Finally, middle-click to complete the capture. If you want to capture just a small region of the screen, click on Capture Region, and then draw a region to capture with your mouse.
Under the Capture Screen Process, you can click the Copy to clipboard radio button if you want to bypass the Photoscape editor and place the captured image directly in your clipboard. Otherwise the image will open in the editor tab for you to modify and save if desired.
Photo mosaic
A photo mosaic is just a combination of different photos on a single page for you to show off your photos to friends and families without having them to flip through each one of them. Click on the “Page” icon in the Photoscape menu. Choose a page layout in the right pane that suits your needs best.
You can change the photo page margin size, border roundness and background color or insert a frame for your photo page from the right pane to perfect your mosaic. Some basic color filters are also available at your disposal to enhance your photos. Finally, click on save to make your photo page and view it in the Photoscape Viewer.
Add backlight effects
If you have some dull photos, you can add some backlight effects to illuminate the subjects from behind, and make dark areas brighter.
Open any photo with Photoscape. The original image will open in Photoscape Editor. Click on the Backlight Effects button in the bottom pane under the “Home” tab a few times until you get the desired backlight effect for your photo. Save the photo once you are finished.
Bulk resize your photos
Resizing multiple photos to upload them over the internet is an extremely tedious and repetitive work. But with Photoscape, you can batch resize them in one single click with the “Convert All” function.
Click on the “Batch Editor” icon in the Photoscape menu, click on the “Batch Editor” icon. In the batch editor workspace, open the folder that contains photos that you want to batch resize.
Use [Ctrl] + Left Click to select multiple photos and then drag them onto the workspace.
You can use various resizing options from the Home tab in the right pane. Select the one that fits your needs. The center pane of the workspace will show a real time preview of the changes you’ve made.
Finally, click on the “Convert All” button to batch resize your images. Once you are done setting the naming convention for resized files and the output folder and format, wait for some time for Photoscape to finish the job. The program might appear to have hung during this process, but there’s nothing to panic about.
Create lolcat pictures
Photoscape lets you create improved lolcats pictures with conversation balloons and text captions.
Click the Editor Button in the Photoscape menu. Browse and open your picture in the workspace. Go to the Object tab in the bottom pane. Click on the “Balloon” icon to add and edit a conversation balloon. Select the font properties, and the conversation balloon of your choice. At all times, you will get a live preview of your balloon and any changes you make to it.
Click on Ok and finally save in the bottom pane and you are done creating your own lolcat picture / cartoon.


 TechQuark is a mobile-friendly website. Simply bookmark